Baby Passport Photo Tips: How to Photograph Infants and Toddlers for Passports
Taking a passport photo of a baby or toddler is challenging. Learn how to position infants, keep their eyes open, hide your hands, and meet country-specific baby photo rules.
Why Baby Passport Photos Are So Challenging
Taking a passport-compliant photo of a baby is one of the most frustrating tasks parents face. The same rules that apply to adult passport photos, including neutral expression, eyes open, looking straight at the camera, and plain background, also apply to infants. Yet babies cannot follow instructions, stay still, or control their facial expressions.
Despite the difficulty, babies need passports too. Most countries require children of all ages, including newborns, to have their own passport for international travel. There is no minimum age. A baby born today can have a passport application submitted tomorrow.
The good news is that immigration authorities around the world understand the challenges of infant photography and have slightly relaxed standards for very young children. However, there are still rules you must follow. This guide will walk you through every step of getting a compliant baby passport photo.
If you still need to make the file, start with the passport photo maker. If the baby photo is for a U.S. passport route, use the US passport photo maker. If the image is already made and only needs a final review, use the passport photo checker. If you want examples before you submit, read the acceptable passport photo examples guide.
Some parents reach the same problem from a different angle and search for phrases like fotografías infantiles tamaño. In a document-photo workflow, that question is not really about a generic child print size. It is about the correct passport or ID format for a baby or toddler, which still has to start from the document rule.
Age-Specific Rules by Country
Most countries apply modified standards for children under a certain age, typically under 6 or under 1 year old. Here is what the major passport-issuing authorities say about baby photos.
| Country | Age Exception | Modified Rules |
|---|---|---|
| United States | Under 6 years | Neutral expression not strictly required. Eyes must be open. |
| United Kingdom | Under 1 year | Eyes do not have to be open. Mouth can be open. No other people in photo. |
| United Kingdom | 1-5 years | Eyes should be open. Neutral expression not strictly required. |
| Canada | Under 3 years | Neutral expression not required. Eyes open preferred but not mandatory for newborns. |
| Australia | Under 1 year | Eyes can be closed for newborns. Expression rules relaxed. |
| France | Under 6 years | Slight smile acceptable. Eyes should be open if possible. |
| Germany | Under 6 years | Mouth can be slightly open. Neutral expression not required. |
| India | Under 1 year | Eyes open not strictly required for newborns. |
Universal Rules That Still Apply
Even with relaxed standards for babies, the following rules still apply in all countries: the baby must be the only person visible in the photo, the background must be plain and the correct color, no toys or pacifiers visible, and the face must be clearly visible and front-facing.
How to Position the Baby
The biggest practical challenge is getting the baby into a position where the camera captures a straight-on, front-facing view of the face against a plain background. There are several methods that work well.
Method 1: Lying on a White Sheet
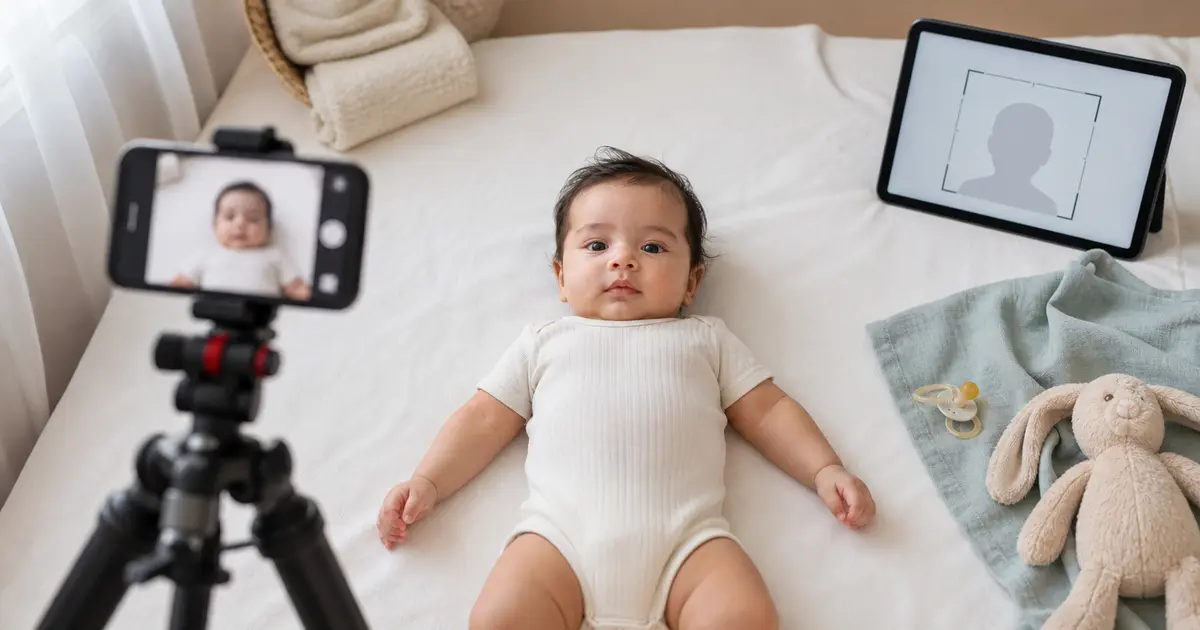
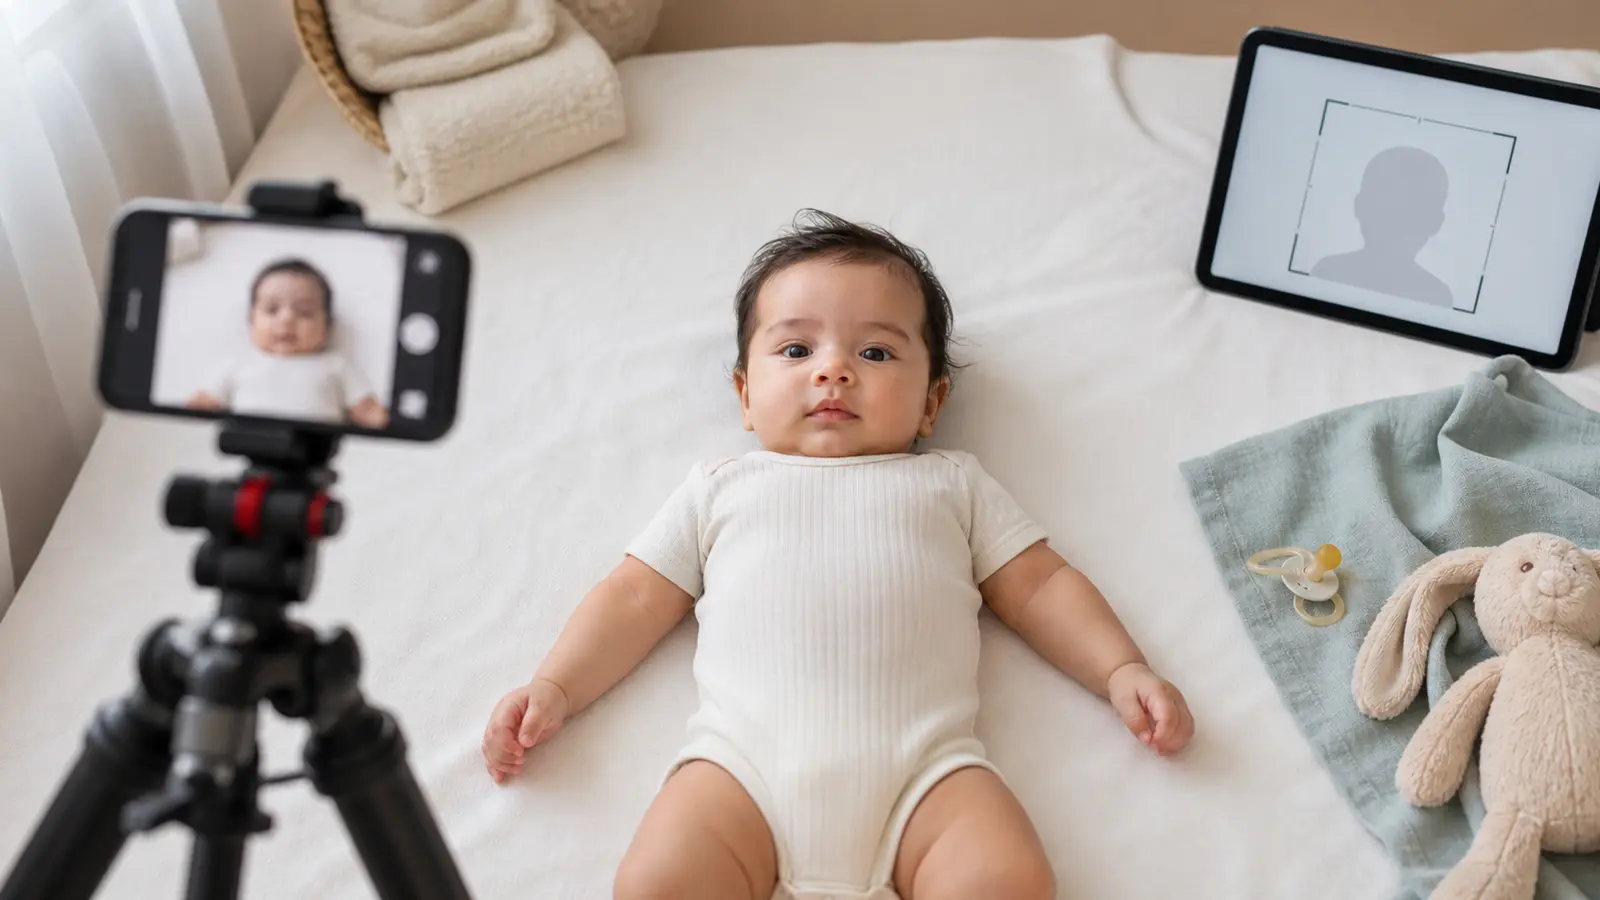
This is the most reliable method for young babies who cannot sit up. Lay a clean, wrinkle-free white sheet or blanket on a flat surface such as a bed, floor, or table. Place the baby on their back on the sheet, facing straight up. Position your camera directly above, looking straight down at the baby's face. This naturally creates a front-facing view with a white background.
Method 2: Car Seat or Bouncer
For babies who can hold their head up but cannot sit independently (typically 3-6 months), a reclined car seat or bouncer can provide support. Drape a white sheet over the seat, ensuring it covers the entire visible area behind the baby. Position the camera at the baby's eye level, directly in front.
Method 3: Parent Holding (Hidden)
A parent can hold the baby against a white wall or sheet, but no part of the parent must be visible in the final photo. This means your hands, arms, clothing, and body must all be out of frame or hidden behind the baby. One effective technique is to drape a white sheet over yourself and hold the baby in front of you, so the sheet serves as both the background and a cover for your hands. Passlens can crop the image to exclude your hands if they are at the edges of the frame.
Wrinkle-Free Background
Iron or steam the white sheet before use. Wrinkles in the fabric create shadows that appear as an uneven background in the photo. Pull the fabric taut if possible. If wrinkles are unavoidable, use Passlens's background removal to replace the sheet with a clean, solid-color background.
Getting the Baby's Eyes Open
Getting a baby to keep their eyes open and look toward the camera at the moment the photo is taken requires patience and a few tricks.
- Timing is everything. Take the photo when the baby is alert and content, not hungry, tired, or overstimulated. Mid-morning after a feeding and short nap is often the best window.
- Use a noise-making toy. Have a helper hold a rattle or squeaky toy directly behind and above the camera lens. The sound will attract the baby's attention toward the camera. Remove the toy from the frame before shooting.
- Use a bright object. A colorful toy or your phone with a bright, animated screen can attract the baby's gaze. Position it right next to the camera lens.
- Talk to the baby. Have someone stand directly behind the camera and talk, sing, or make funny noises. Babies instinctively look toward familiar voices.
- Use burst mode. Set your phone camera to burst mode (hold down the shutter button) and take 20-30 photos in rapid succession. Review them afterward and choose the best one with eyes open and facing the camera.
- Try multiple sessions. If the baby is not cooperating, take a break and try again in 30 minutes. Forcing the photo when the baby is upset will only make things harder.
Remember that for newborns (typically under 4 weeks), many countries do not strictly require the eyes to be open. Check the specific rules for your country before stressing over this requirement.
What Must Not Be Visible in the Photo
Several items that are common around babies must be excluded from the passport photo. Immigration authorities are strict about these rules, even for infant photos.
- Pacifiers and dummies: Must be removed before taking the photo. Nothing should be in or near the baby's mouth.
- Toys and comfort objects: No stuffed animals, blankets, or toys visible in the frame.
- Parent's hands or body: No part of another person can be visible. If you are holding the baby, your hands must be completely hidden.
- Hats, headbands, and hair accessories: No head coverings unless worn for religious or medical reasons. Decorative headbands and bows must be removed.
- Bibs and feeding equipment: Remove bibs before photographing.
- Car seat straps or bouncer harnesses: If using a seat for support, the straps must not be visible across the chest or face.
- Other children or siblings: Only the subject child can appear in the photo.
Hidden Support
If the baby needs physical support to stay in position, ensure the support mechanism is completely covered by the white background sheet or is outside the crop area. Rolled towels under the sheet can help position a newborn's head straight without being visible in the photo.
Lighting Tips for Baby Photos
Babies have soft, delicate skin that is particularly sensitive to harsh lighting. The wrong lighting can create unflattering shadows or wash out the baby's features.
Best Lighting Setup
- Diffused natural light: Position the baby near a large window with indirect daylight. Overcast days provide the softest, most even lighting.
- Avoid direct sunlight: Direct sun creates harsh shadows and can cause the baby to squint.
- No flash: Camera flash can startle babies and cause red eye. It also creates harsh, unflattering light. Use continuous ambient lighting instead.
- Even illumination: Ensure both sides of the baby's face are evenly lit. If one side is darker, use a white piece of cardboard or foam board as a reflector on the darker side.
For Lying-Down Photos
When photographing a baby lying on their back, be careful not to block the light with your body as you lean over to take the photo. Position yourself so that the light source illuminates the baby's face from the side or from above, not from behind you. If using artificial light, place it at the baby's head level (above the sheet) aimed gently downward toward the face.
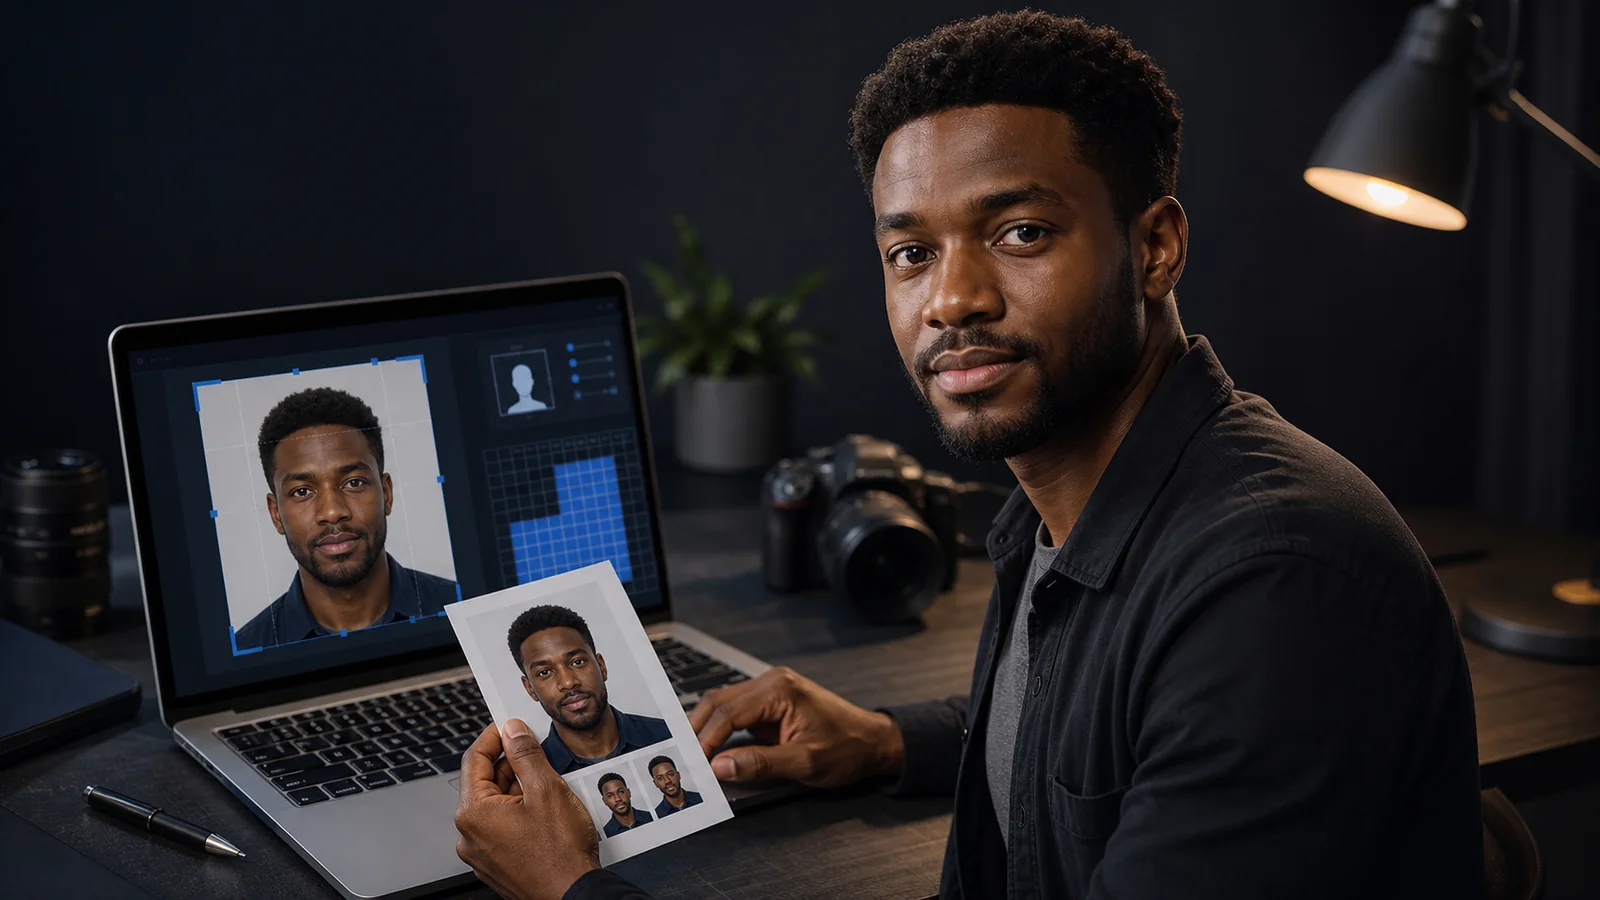
Editing Baby Passport Photos in Passlens
After taking multiple photos, select the best one and edit it in Passlens. The app's face detection works with babies and will position the crop correctly for infant facial proportions.
- Open Passlens and select your country and document type
- Upload the best photo from your session
- Passlens will detect the baby's face and suggest a crop. Adjust if needed.
- If parent's hands or a non-white background are visible, use background removal
- Review the crop to ensure the baby's face is centered and appropriately sized
- Export for digital upload or print layout as needed
For very young babies whose facial features are proportionally different from adults (larger forehead, smaller chin), you may need to manually adjust the crop slightly. Passlens's face detection is optimized for adult proportions, so verify that the baby's entire face, from the top of the head to the chin, fits within the guidelines.
Pro Tips: Summary for a Successful Baby Photo
Taking a passport photo of a baby requires patience, but the process becomes much easier once you know the tricks. Here is a summary of the key points.
- Choose the right time: Alert, fed, rested, and content. Avoid nap time and feeding time.
- Prepare everything first: Set up the background, lighting, and camera before bringing the baby into position. Minimize the time the baby needs to cooperate.
- Use the lying-down method for babies under 6 months who cannot sit up.
- Have a helper: One person operates the camera while another holds the baby's attention (or holds the baby, hidden).
- Shoot in burst mode: Take many photos. You only need one good one.
- Remove everything: No pacifiers, toys, hats, bibs, or visible hands.
- Check your country's baby rules: Many countries relax expression and eye requirements for very young children.
- Use Passlens background removal if you cannot achieve a clean background. This is especially useful for the lying-down method where wrinkled sheets are common.
- Be patient: It may take multiple attempts across different days. This is normal.
Passport Validity for Babies
Baby passports typically have a shorter validity period than adult passports. In the US, passports for children under 16 are valid for only 5 years. In the UK, child passports are valid for 5 years. You will need to repeat this process when the passport expires. The good news: as your child grows older, photos become much easier to take.