Passport Photo Glossy or Matte? Paper Finish, Weight, and Print Settings (2026)
For U.S. passport photos, matte or glossy photo-quality paper can work. Compare glossy, matte, luster, paper weight, 4x6 sheets, and 100% print-scale checks.
Fast answer: passport photo glossy or matte
For U.S. passport photos, either matte or glossy photo-quality paper can be acceptable. The U.S. Department of State says printed passport photos should be on matte or glossy photo-quality paper. That means the finish is not the whole decision; the print still has to be sharp, correctly sized, and free from visible printer dots.
Use glossy or luster first if your printer keeps facial detail crisp without harsh reflections. Choose matte when reflections, fingerprints, or handling marks are the bigger issue. Matte is not automatically safer; it still has to look clean on your exact printer and paper setting.
Do not use plain office paper, thin copier paper, draft mode, or any print setting that softens a small face. Print the finished layout at 100% scale, then measure before cutting. If you need the layout step, use passport photo print layouts, the 4x6 passport photo template, or the passport photo maker.
| Question | Direct answer | Next step |
|---|---|---|
| Are passport photos glossy or matte? | For U.S. printed passport photos, matte or glossy photo-quality paper can work. | How to print passport photos |
| Which finish should I choose first? | Glossy or luster is usually the safer first test for sharp detail. | Passport photo print layouts |
| When is matte better? | Use matte when glare, fingerprints, or handling marks are causing the problem. | 4x6 passport photo template |
| What still causes rejection? | Wrong size, visible printer dots, bad crop, poor background, or printer scaling. | Passport photo checker |
Why photo paper matters more than most users expect
Passport photos are small, which means paper problems show up immediately. A sheet that scatters detail, absorbs ink unevenly, or behaves badly in the printer can make a carefully prepared image look softer and less stable than it should. A surprising number of “printer problems” are really paper problems or paper-setting problems.
That makes passport photo paper a practical non-YMYL buying topic. The user is not making a legal or financial decision. They are choosing a consumable that directly affects the final output. Good guidance here should save them from burning through paper, ink, and patience on the wrong finish or the wrong sheet size.
That is also what people usually mean when they search for best passport photo paper or best paper for passport photos. They are not looking for gallery-grade theory. They want to know which paper helps a small document portrait stay sharp, cut cleanly, and still look trustworthy after it leaves the printer.
For most passport photos, glossy or luster is the safer starting point. Choose matte only when glare or fingerprints are the bigger problem and you have already checked that the softer surface still looks clean on your printer. If you are ready to build the full print file, move next to passport photo print layouts, the 4x6 passport photo template, or the passport photo maker.
Glossy, matte, and luster: what changes in practice
| Finish | Strengths | Tradeoffs |
|---|---|---|
| Glossy | Strong detail, saturated output, familiar photo-lab look | Shows fingerprints and reflections more easily |
| Matte | Low glare, easier handling, softer surface look | May feel less punchy than glossy on some printers |
| Luster / semi-gloss | Middle ground between detail and reflection control | Availability varies by printer and paper line |
There is no universal rule that says one finish is always correct, but glossy and luster are often the safest bets for home passport-photo printing because they hold fine detail well. Matte can still make sense when glare and fingerprint handling are the main annoyance, but it is worth testing with the exact printer and driver settings you plan to keep.
The same practical question appears in German searches like foto matt oder glänzend, fotopapier matt oder glänzend, or matt oder glänzend fotos. For passport photos, the right finish is the one that keeps facial detail crisp, avoids ugly glare, and still feels easy to handle after printing and cutting.
Paper weight, stiffness, and why thin sheets feel worse
Paper weight matters because people are usually cutting several small photos from the same sheet. Thin photo paper can feel flimsy, curl more easily, and make the final cut result feel cheaper than it should. Heavier paper is not automatically better, but a passport photo printed on stock that feels too light often looks wrong even when the image itself is technically fine.
A useful rule is to treat the final print as a physical object, not just a file. Stiffer sheets usually feed more consistently, cut more cleanly, and keep small portraits looking stable once trimmed. That does not mean you need fancy fine-art stock. It means the cheapest bargain paper can easily undermine output you already spent time preparing.
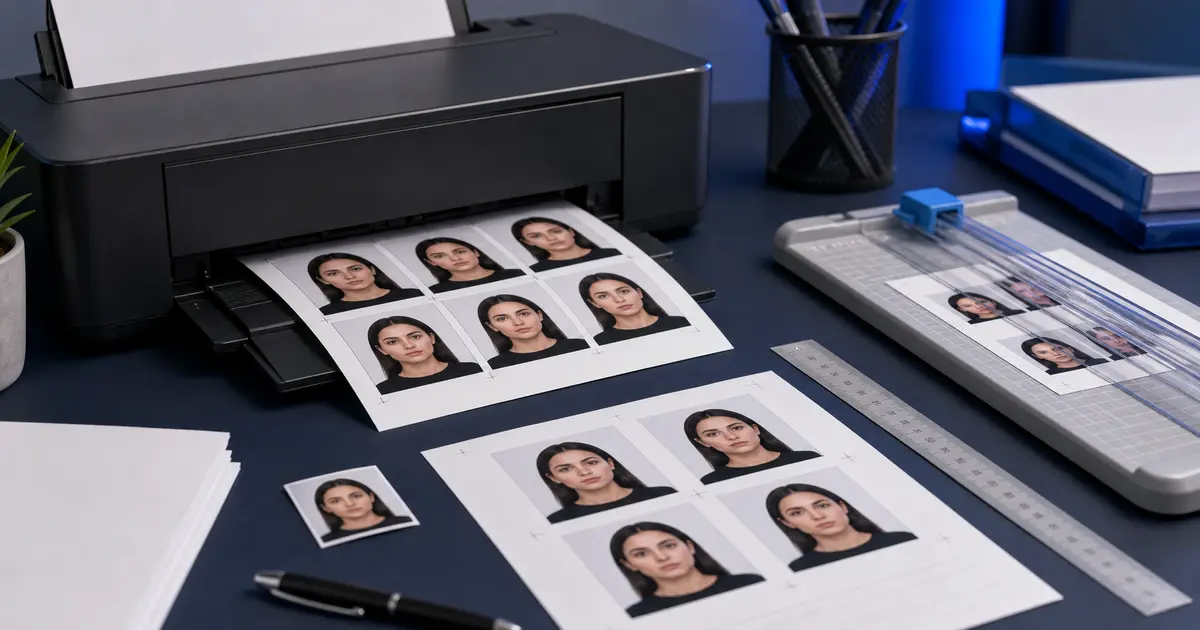
4x6 sheets versus A4 or Letter sheets
The right sheet size depends on the layout workflow. If someone mostly wants a few copies of one passport-size image, 4x6 is efficient and easy to handle. If they want more copies, more document formats, or a combined print layout, A4 or Letter may be the better fit. The common mistake is picking the sheet first and only later discovering that the printer or layout workflow becomes harder to control on that paper path.
That is why template and paper guides belong together. Paper choice affects print behavior, but layout strategy determines how much of that paper is actually useful. A 4x6 workflow can be excellent for repeat passport prints. A larger sheet can be the better option when the software keeps spacing, margins, and scale under control.
If you are still comparing the hardware side, keep the passport photo printer guide open too. Paper and printer choices are tied together much more tightly than most users expect, and the cheapest way to waste time is to solve only one of those two decisions.
The paper setting must match the actual sheet
This is one of the easiest mistakes to avoid and one of the most common. Epson, HP, and Canon all document the importance of matching media type or paper setting to the sheet in the printer. The printer changes ink load and handling assumptions based on that choice. If the driver thinks you are printing on plain paper while you are actually feeding glossy photo paper, the result can look flat, messy, or uneven.
Simple rule
Treat the paper setting as part of the paper choice. Choosing the sheet without setting the media type correctly is only half the job.
Representative sources and related guides
- U.S. Department of State - Passport photo paper and print quality
- HP Support - Print photos with an HP printer
- Epson Support - Paper type settings and media options
- Canon Manual - Printing photos
- Passlens - Passport photo printer guide
- Passlens - How to print passport photos at home
- Passlens - Passport photo template guide