Passport Photo Checker: How to Validate a Passport or Visa Photo Before You Upload or Print (2026)
Use a passport photo checker to validate crop, head size, background cleanup, file format, and print readiness before you upload or print. Built for users who want fewer avoidable rejections and a clearer route into the editor.
What people usually mean by passport photo checker or validator
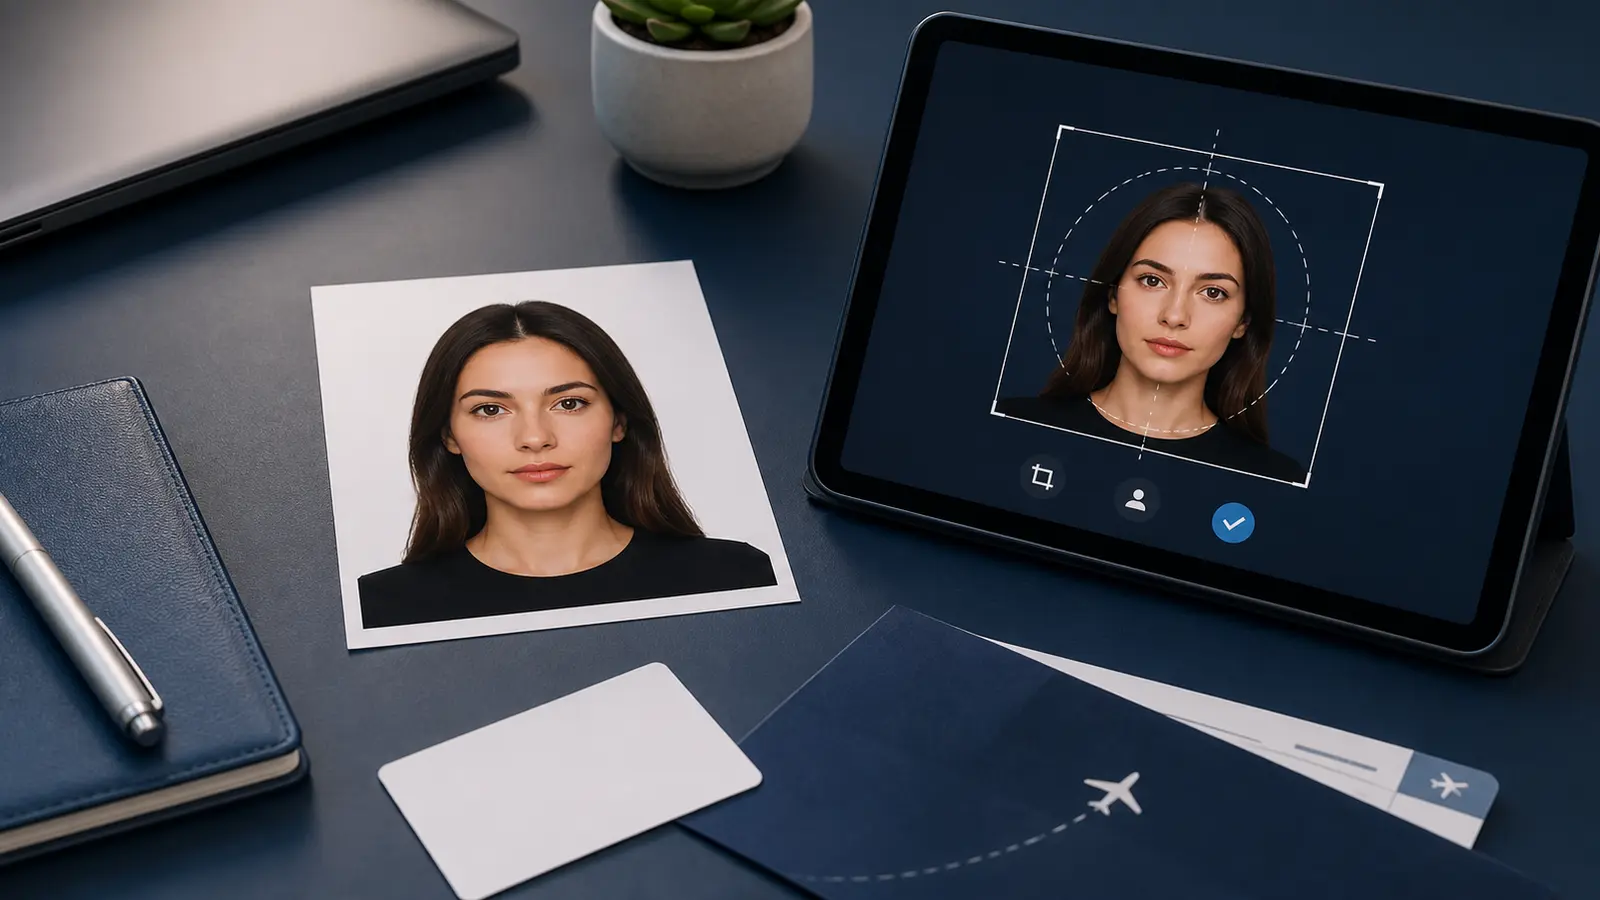
Most people searching for a passport photo checker are not asking for a magical score. They want a practical answer to a simpler question: “Does this photo look safe enough to submit or print, or am I about to waste time?” That makes the topic more useful than it sounds. A good checker helps the user catch problems before the file leaves the editor, not after a kiosk print, upload rejection, or awkward second attempt.
The word validator usually points to the same job. Users want a workflow that checks framing, background, file readiness, and output confidence. They do not just want the crop to look neat on screen. They want to know whether the final image still makes sense when it is measured, uploaded, or printed.
That same need shows up in more specific searches like Australian visa photo checker. The country changes, but the real question stays the same: is the photo ready to move forward, or is there still something obvious to fix before upload?
For the direct preflight page, use the passport photo checker. This article explains the thinking behind the checks, while the public page keeps the route short for users who already know they need a checker.
If you still need to make the file, start with the passport photo maker. If the real route is a U.S. passport upload, use the US passport photo maker. If the blocker is the square digital target, use the 600x600 passport photo maker. If you only need the shortest final-review route, use the passport photo checker.
If you want a calmer pass-or-fail benchmark before the last review, read the acceptable passport photos guide first.
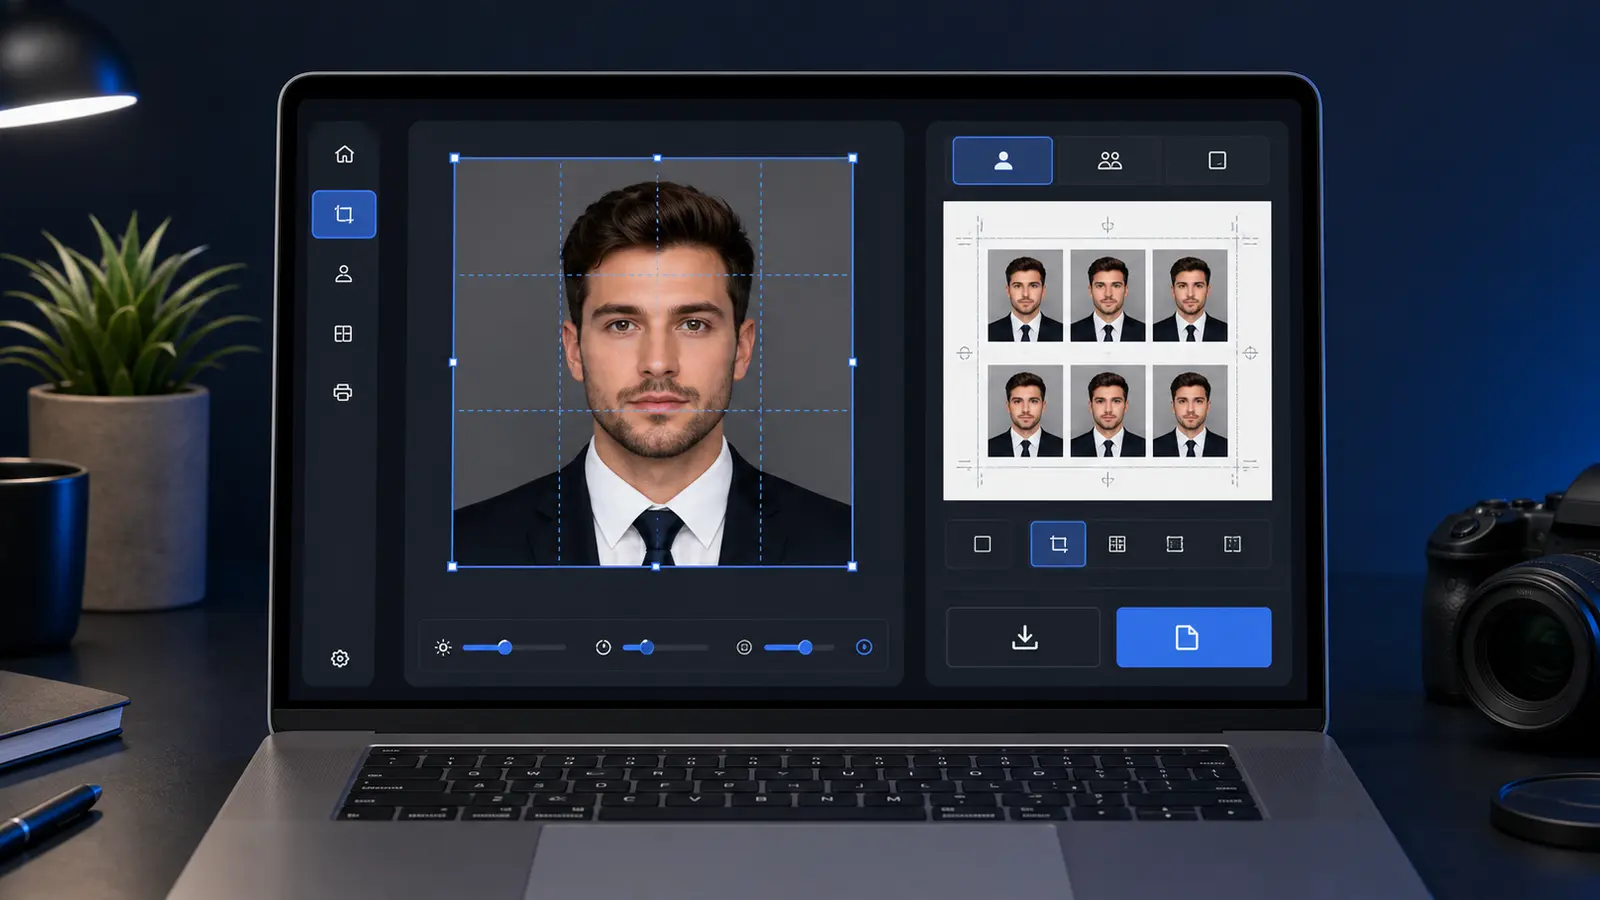
What a useful passport photo checker should actually verify
| Check | Why it matters |
|---|---|
| Document preset | A checker that is not tied to the right passport, visa, or ID workflow is guessing before it starts. |
| Face framing and head size | A photo can look clean and still feel wrong if the face is too small, too large, or too close to the edge. |
| Background edge quality | Hair, ears, jawline, collars, and shoulders are where weak cleanup usually shows. |
| Digital export readiness | Many upload failures come from file shape, dimensions, or quality, not from obvious visual defects. |
| Print readiness | If the user is printing, the sheet layout and 100 percent scale matter as much as the crop itself. |
That list is why a checker belongs close to the actual editor. If the user has to leave the workflow just to “validate” the result somewhere else, the product is probably solving the wrong half of the problem.
Where automated checkers still fall short
A checker can help, but it should not pretend to replace the user’s last visual review. This is especially true around background edges, soft shadows, heavy hair detail, and over-compressed camera files. A rigid checker can miss a subtle edge problem. A loose checker can wave through a result that still feels wrong once you zoom in. That is why the best workflow combines guided checks with a calm final review before export.
That is also why some of the strongest support pages around a checker are not “more AI” pages. They are practical pages like a crop-tool guide, a background colour guide, and a digital upload guide. Those pages help the user understand what to inspect instead of hiding behind automation language.
Checking for digital upload is not the same as checking for print
- Digital upload: focus on dimensions, file clarity, compression, and whether the face still reads cleanly at the uploaded size.
- Print path: focus on physical dimensions, 100 percent scale, sheet layout, and whether the background still looks even on paper.
- Hybrid workflow: users often need both, which is why the editor should make the final export path obvious rather than forcing a second tool.
This is where a lot of weak checker pages go off course. They talk as if “pass” is one universal state. It is not. A result can be good for a digital upload and still be poorly prepared for printing. A result can be printable and still be the wrong digital file for a portal. The checker has to stay tied to the actual output path.
A better way to use a passport photo checker
- Start with the exact passport, visa, or ID preset instead of a generic photo crop.
- Run the crop and background review inside the editor.
- Inspect the face edge, collar, and background transitions at normal zoom and close zoom.
- Choose the final output path: digital file, print sheet, or both.
- Do one last manual review before you save or print.
That order sounds simple, but it prevents a lot of unnecessary rework. It keeps the check inside the job the user is already trying to finish.