Free ID Photo Maker Online: Passport, Visa, Biometric, and Photo ID Workflows (2026)
Use a free ID photo maker online for passport, visa, biometric, and government photo ID workflows. Learn how to choose the right document, review crop and background, and export a private no-signup photo without a watermark.
What people mean by “ID photo maker” or “biometric photo maker”
Searches for ID photo maker online or biometric photo maker usually mean: “I need a passport-style image for an official document, and I need help making it look compliant.” That request is broader than passports. It can include visas, national ID cards, residence permits, and some driving-licence workflows that still use a user-supplied photo.
The reason these searches are tricky is that “biometric photo” sounds like one standard but is really a family of document-photo rules. The common thread is a front-facing portrait, clear facial visibility, and a clean background. The specific outer size, head range, and output mode still depend on the country and document.
That is why biometric photo maker online is usually a better description of the real job than a vague “ID editor” label. The user is not trying to design an image. They are trying to finish a document-photo workflow that still needs the correct preset, crop, background, and export path.
The same intent sometimes appears as photo ID app. In practice that still points to the same need: a tool that helps turn a normal portrait into a usable government-style ID image instead of just offering a generic camera filter or crop box.
In Spanish, that same job often shows up as foto biométrica or fotos biométricas. The wording changes, but the need does not: the user still wants one place to prepare a passport-style or ID-style portrait with the right crop, a plain background, and an export that matches the document workflow.
Free ID photo maker online: the quick answer
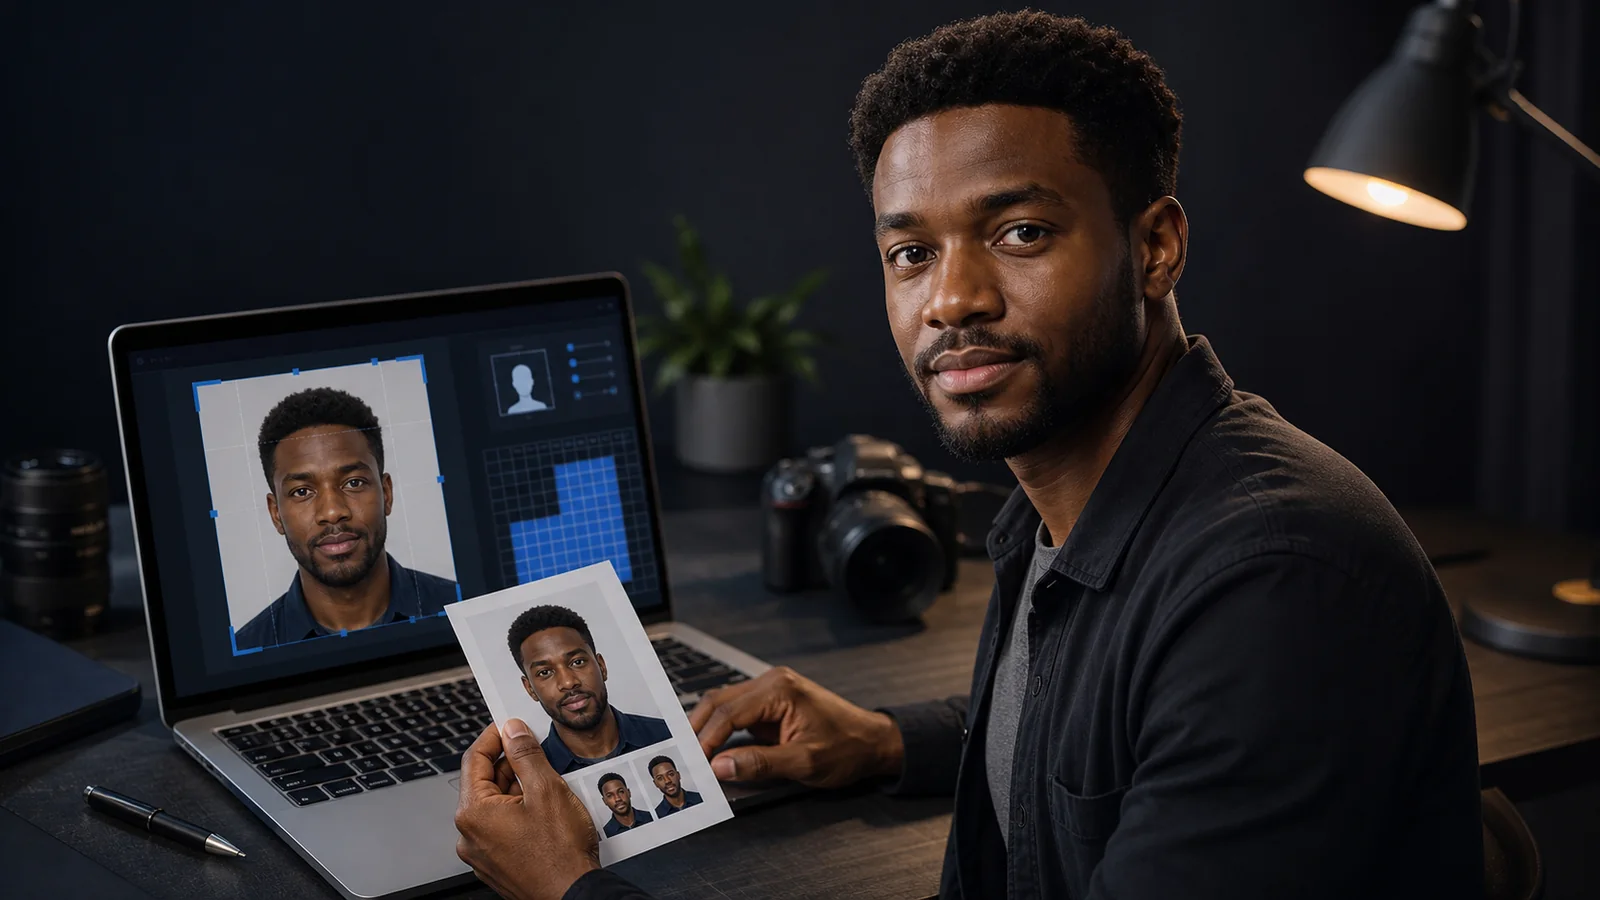
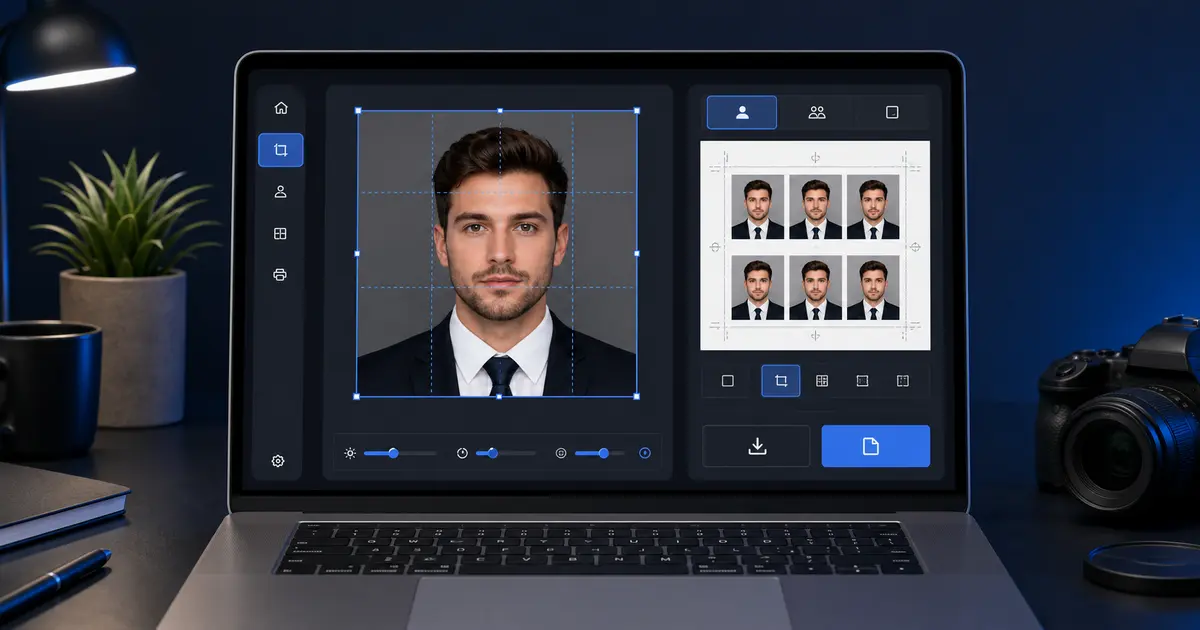
A free ID photo maker online should help you make a passport, visa, and ID card photo from a normal portrait without turning the last step into a paywall. A useful tool gives you more than a crop box: it should help you pick the document, frame the face, review the background, and export a file or print sheet that matches the route you are using.
No signup, no watermark, and no upload by default is the standard Passlens is built around. Start in the Passlens app, choose the exact document before you crop, then use the review step to check the face position, background, and output path before downloading.
| Search intent | What the user usually needs | Best Passlens route |
|---|---|---|
| free ID photo maker online | A no-signup workflow for a passport-style or government ID-style photo | Open Passlens |
| passport, visa, and ID card photo | A document preset first, then crop and background review | Compare photo sizes |
| ID photo maker online free | A download path that does not add a watermark after editing | Clean export guide |
| photo ID app | A phone-friendly route that still lets the user inspect the result | Phone photo setup |
What free ID photo tools often leave unclear
Many free ID-photo pages lead with fast AI claims, country counts, and a two- or three-step upload flow. Those can help, but they do not answer the whole question. The workflow still needs to be clear about what happens before and after the edit: the selected document, the accepted background, the export file, and the print route if the user needs paper output.
- Document choice: choose the exact document before you crop, because a passport, visa, residence permit, national ID, and driving licence can use different frames.
- Background rule: check the actual country or authority rule instead of assuming every ID photo needs the same white background. Use the background color guide when the rule is unclear.
- Phone source: start with a clean phone photo when you can. The at-home phone guide covers lighting, distance, posture, and common failure checks.
- Export path: decide whether you need a single digital file, a 4x6 sheet, A4, or Letter output before you download.
- Privacy: prefer browser-local work for ordinary edits, and only choose enhanced processing when the task actually needs it.
This is the gap Passlens should own: not louder claims, but a calmer route from a broad ID-photo search to the exact document workflow. The page should help users stop bouncing between a free generator, a background remover, a pixel-size article, and a print-template page just to understand one ID photo.
Which documents usually need this kind of photo
- Passports
- Visa applications
- National ID cards
- Driving licences in workflows that genuinely accept user-supplied images
- Other government or institution ID workflows that explicitly reuse passport-style photo rules
The exact document matters because the right answer is not “make a biometric photo.” The right answer is “make the biometric photo for this document.” A good tool helps the user narrow that down instead of hiding the choice behind a generic crop screen.
Official rules show why that document-first approach matters. The U.S. passport photo route uses a 2 x 2 inch photo with a defined head-height range. GOV.UK digital photos have pixel and file-size rules as well as background and lighting rules. France requires an approved photo route for passports and identity cards. A generic free ID photo generator can be useful, but only after you know which rule set you are trying to satisfy.
What to verify before export
| Check | Why it matters |
|---|---|
| Document size | Passport, visa, and ID formats can differ even inside the same country |
| Face framing | Head too small or too large is a common rejection reason |
| Background colour | Some workflows accept white only; others allow light grey or blue-grey |
| Natural edges | Hair, jawline, and shoulders must remain believable after background cleanup |
| Output type | Some users need a digital file only, while others need a printable sheet |
That verification step is where a real ID-photo workflow earns its value. If the tool leaves the user guessing, it is not doing the hardest part of the job.
What to expect on iPhone, in a photo-ID app, or in a free online maker
Searches like id photo iPhone, id photo app iPhone, or photo ID app usually mean the user wants the quickest possible route from a phone camera to a printable or upload-ready file. That is reasonable, but the useful question is more specific than “Can I do it on an iPhone?” It is “Will the app keep the crop, background, and export format under control after the picture is taken?”
That is also where free ID photo maker or ID photo maker online free queries become more specific than they look. Users are not shopping for a vague freebie. They are trying to avoid paying for a tool that still leaves them with the wrong crop, the wrong head size, or a file that needs another round of cleanup somewhere else.
In that sense, ID photo iPhone, free ID photo maker, and ID photo resizer are all just different ways of describing the same end goal: get from an ordinary phone image to a document-ready portrait without breaking the workflow halfway through.
Crop, resize, and resizer questions are still one workflow
A lot of the cluster around this page is really the same job phrased three ways: make ID photo, ID photo crop, and ID photo resizer. Those are not separate needs. They are the same passport-style document workflow viewed from different angles. One user starts with the camera and thinks “make it.” Another starts with a portrait and thinks “crop it.” Another starts with the wrong output size and thinks “resize it.” The underlying task is still to turn an ordinary portrait into a document photo that keeps the right framing and final dimensions.
That is also why “how to take a good ID photo” belongs here. The photo still has to start from a decent source image: straight posture, even light, a clean background, and a face that is easy to fit into the target frame. Good editing helps, but it cannot rescue a source image that already starts with blur, harsh shadow, or a bad angle.
ID photo cropper, resizer, and custom-size searches
Many users do not search for a full maker first. They search for an ID photo cropper, an ID photo resizer, a 1 inch ID photo, a 2 inch ID photo, or a way to set a red, blue, or white background. That usually means they already know one part of the rule but still need the crop, final size, and export path to stay tied together.
Passlens handles that through the document preset first. If the rule is already in the catalog, start there. If the authority gives you a size that is not listed, use the custom preset and enter the exact millimetres before you upload. That is safer than cropping first and trying to resize a finished portrait later.
| Search phrase | What to check before export | Passlens route |
|---|---|---|
| ID photo cropper | Choose the document before moving the crop box, then verify head size and background | Open the app |
| ID photo resizer | Resize only after the frame is correct. Do not stretch the face to hit a pixel target. | Pixel-size guide |
| 1 inch / 2 inch ID photo | Labels like 25×35 mm and 35×45 mm are common, but the issuing authority still controls the final frame. | 35×45 size guide |
| Custom ID photo size | Use a custom preset when the checklist gives exact width, height, and optional head range. | Crop tool guide |
| Red, blue, or white background | Match the official rule. Some local ID workflows use colour backgrounds, while many passport-style routes stay white or light grey. | Background guide |
The important distinction is simple: a cropper changes the frame, a resizer changes the output dimensions, and an ID-photo maker keeps both tied to the document rule. For official photos, that third piece is the part that prevents most avoidable mistakes.
U.S. ID-adjacent workflows people search with “ID photo maker”
In the United States, ID photo maker online searches often overlap with passport-style 2x2 workflows rather than a generic state-ID upload. A green card, EAD, citizenship, or some school and institution forms may ask for a passport-style photo. A state driver-license or REAL ID route often captures the image in person, so the user-supplied photo is not always the final card image.
- 2x2 photo maker guide for U.S.-style square passport, visa, and immigration photo preparation.
- Green card photo guide for route-controlled USCIS and Diversity Visa photo checks.
- EAD photo guide for employment authorization workflows that ask for passport-style photos.
- Citizenship photo guide for N-400/N-600 photo expectations when an application path asks for photos.
- student ID photo guide for campus portals that define their own upload size and background rules.
- U.S. state driver-license guide for cases where the DMV captures the card image or only accepts photos in narrow exceptions.
That split matters for U.S. traffic. Passlens can help prepare a passport-style file when the checklist asks for one. It should not pretend to replace a DMV, campus office, or live biometric capture step when that is the actual authority workflow.
Why generic editors fail this job
A generic image editor can resize and crop, but it does not know whether your target is a 35×45 passport, a 26×32 DNI, a 2×2 square U.S. passport image, or a Canada 50×70 print. That is why generic editing often produces files that look tidy but still miss the real rule set. An ID-photo maker is only useful if it is driven by the document requirement, not by arbitrary canvas controls.
This is also why Passlens keeps the preset choice visible. It is better to ask the user to choose the document than to pretend a single universal biometric template can replace that decision.
Who this kind of tool is actually for
An online ID-photo maker is most useful for people who already have a source portrait and need help translating a government rule into a final compliant file. That includes people preparing passport photos at home, users dealing with a national-ID workflow that still accepts a self-prepared photo, and applicants who want to compare digital versus print output before they submit anything.
It is less useful when the real workflow is live office capture, booth-only e-photo, or a code-based submission system. In those cases the tool still has value as a way to understand the rule set, but it should not pretend to replace the official capture path.
That is the difference between a helpful public guide and misleading product copy: the guide should tell the user where the tool helps and where the authority workflow still has the final say.
Why “biometric photo” still needs document context
The word “biometric” can make users think there is one universal template. In reality it mostly describes a style of portrait: front-facing, clear, well lit, and suitable for recognition. The actual acceptance rule still depends on the issuing authority. That is why a biometric photo maker only becomes genuinely useful when it is attached to the right country and document preset.
In practical terms, the safe order is: identify the document, choose the preset, then use the ID-photo workflow. Not the other way around.
That extra step is what separates a generic image tool from a genuinely useful ID-photo workflow.
It also stops users from applying the wrong kind of “biometric” crop to a document that uses a different frame or background rule.
Best guides to pair with an ID photo maker
- Convert photo to passport photo guide
- Passport photo editor online guide
- Passport photo software guide
- Photo ID requirements guide
- Government-issued photo ID guide
- 2x2 photo maker guide
- Green card photo requirements guide
- EAD photo requirements guide
- U.S. citizenship photo requirements guide
- Student ID photo upload guide
- U.S. state driver-license photo guide
- Driving licence photo requirements guide
- Passport photo app guide
- Face adjustment and auto fit guide
- REAL ID photo guide
- How to get a photo ID guide
Representative sources
- U.S. Department of State — Passport photos
- GOV.UK — Digital and printed passport photo rules
- Service-Public.fr — French identity-photo requirements
- USCIS — Form I-765, Application for Employment Authorization
- USCIS — Form N-400, Application for Naturalization
- Rijksoverheid — Dutch pasfoto requirements
- ICA Singapore — Photo guidelines