Passport Photo File Size Checker: Fix Oversized or Rejected Uploads Before You Submit (2026)
Use a passport photo file size checker workflow to fix oversized or rejected uploads before you submit. Covers JPEG size limits, compression quality, digital upload checks, and how to keep the crop trustworthy after export.

What people usually mean by passport photo file size checker
This search usually appears when the user is already frustrated. The crop may be finished. The background may look fine. Then the upload gets rejected because the file is too large, too compressed, or simply shaped wrong for the portal. That is what makes passport photo file size checker such a strong completion-intent topic. The user is not browsing. They are trying to rescue a submission that is already in motion.
A lot of people also describe the same problem in plainer language: passport photo upload rejected, passport photo too large, or “why won’t this JPEG upload?” Those are all the same family of workflow pain. The user needs a cleaner export path, not a motivational article.
The same intent also appears in Spanish as como reducir el tamaño de una foto. In a passport workflow, that usually means “how do I make this file small enough without wrecking the crop or the face edge?” That is still a document-photo export problem, not a generic compression trick.
If your real route is a U.S. passport or renewal upload, start with the US passport photo maker. If the blocker is the square digital target or export size, use the 600x600 passport photo maker. If the file still needs to be rebuilt inside the normal editor flow, go back to the passport photo maker. If you want the default workflow to stay in the browser until you choose otherwise, use the passport photo maker without uploading by default. If you only need a final review before you submit, use the passport photo checker.
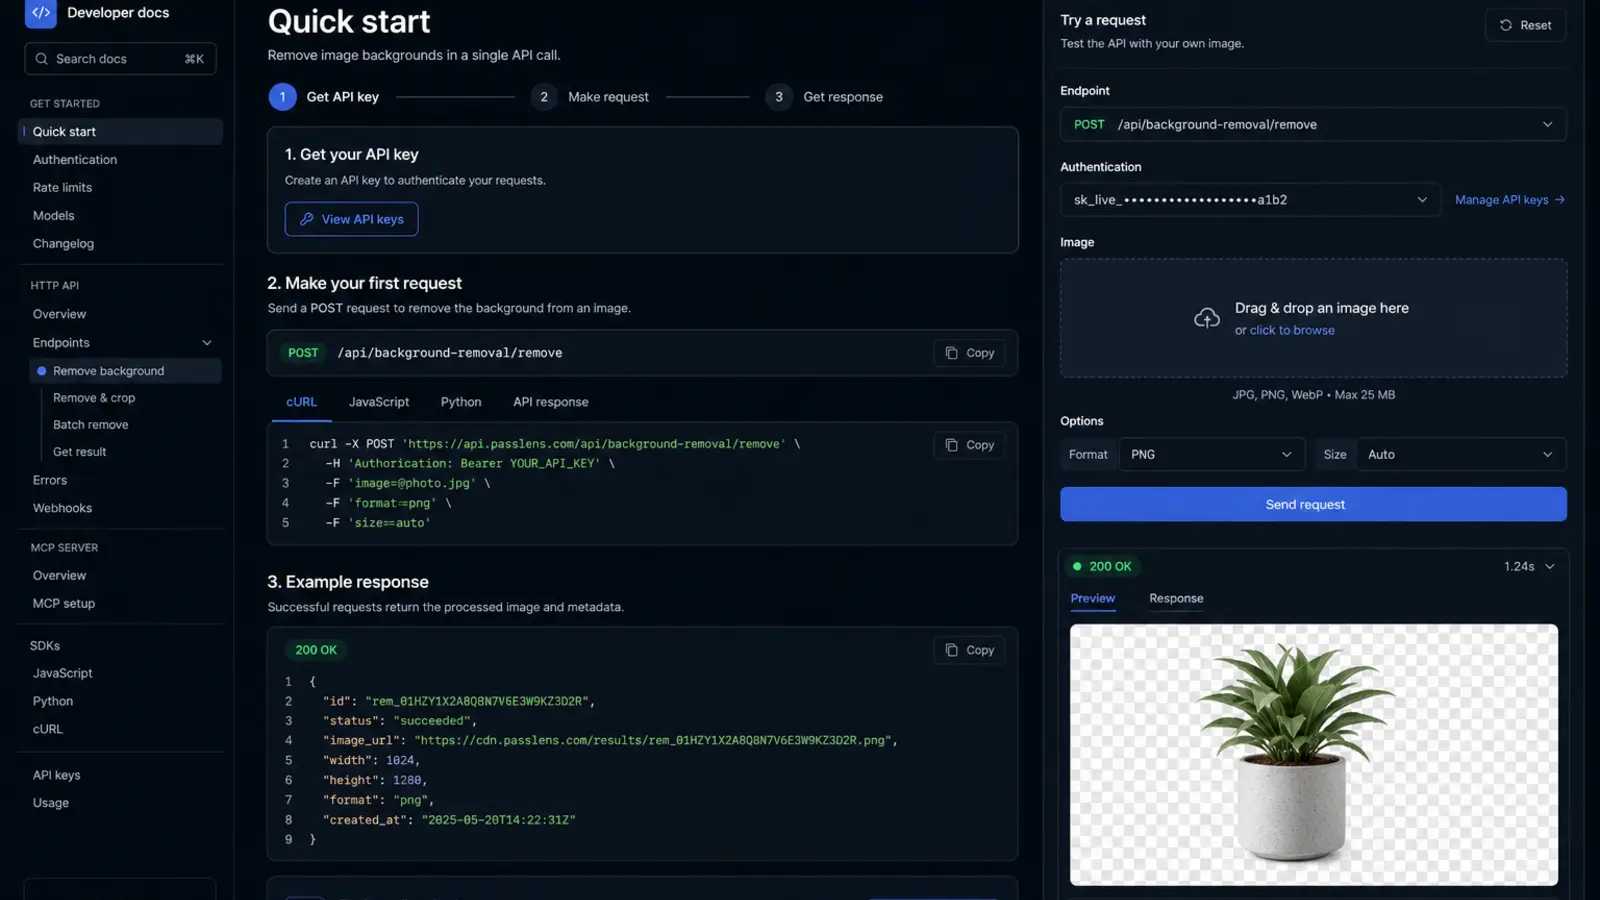
What a useful file-size checker should actually check
| Check | Why it matters |
|---|---|
| Actual file size | Some portals reject the file before the photo is reviewed at all. |
| Pixel dimensions | A small file can still fail if the width and height do not fit the expected range. |
| JPEG quality after compression | Shrinking the file is useless if the hairline, jaw, or background edge falls apart. |
| Aspect ratio | A file can be under the size limit and still fail if the shape does not match the document route. |
| Document preset | The correct export only starts to make sense when it comes from the right passport or visa workflow. |
That is why a file-size checker belongs near the export workflow, not as a detached utility page. The file-size problem is really an export-quality problem with a portal limit attached to it.
Where people usually break the file
The most common mistake is manual resizing after the real editor work is already done. People export a photo, discover that the file is too large, then run it through a random compressor or a messaging app and hope for the best. That often fixes the kilobyte number while quietly damaging the crop, the edge quality, or the visible background. The upload may still fail, or worse, the portal may accept a file that no longer looks trustworthy.
The second mistake is treating every digital passport route like the U.S. route. The U.S. is unusually strict on file size. Other countries can be looser, larger, or simply different. That is why the safest route is to start with the correct preset, then optimize the file for the real submission path instead of memorising one hard number and forcing every document through it.
A practical way to fix a rejected or oversized passport upload
- Start from the exact passport, visa, or ID preset again if you are not sure the original export was tied to the right document.
- Check the portal limit: file size, dimensions, and accepted format.
- Export for upload, not for print.
- Reduce size carefully enough that the file still looks clean around the face and background edge.
- Re-check the final JPEG before you upload again.
Best habit
Do not treat file-size fixing as a separate afterthought. Treat it as part of the export step.